
Various paneer dishes have become quite identified with Indian food in the US but I’d wager that most Americans have never eaten anything better than mediocre paneer. The versions served at every Indian restaurant I’ve ever eaten it in in the US have in fact been worse than mediocre, whether served in a braised dish like palak paneer or fried as pakoras: it’s invariably hard and dense. I suspect most restaurants don’t make their own paneer or that if they do that they make it in mass quantities ahead of time and rarely use it fresh. Then again, paneer made well doesn’t always need to be fresh—as you’ll see, the recipe below freezes very well.
Anyway, if you like eating paneer in restaurants you should really make it at home; it will be a revelation. And if you think making paneer is some sort of higher-level skill, you’re wrong: if you’re capable of bringing milk to a boil and then stirring it you have mastered the two steps of making paneer. That’s pretty much all there is to it: bring milk to a boil, add an acid and stir as it splits the milk. Once the milk has separated into whey and lumpy curds you strain it, cover it with a weight and in as little as 10 minutes you have paneer ready to eat or cook with.
Most recipes on the web will tell you to use lemon juice or vinegar to split the milk but in my opinion superior paneer is that made from milk split with yogurt. The texture is far better and you get a far higher yield. This is not my innovation, of course. Plenty of people do it—I was tipped off by a departed friend, the wonderful photographer, Sue Darlow. Give it a go, it’s dead easy.
Ingredients
One gallon whole milk
Two 32 oz cartons of plain, full fat yogurt
Preparation (see illustrated guide below)
- Pour the milk into a large saucepan with a heavy bottom and bring to a boil slowly over medium-low heat.
- While the milk comes to a boil (be patient) line a colander with a few layers of cheesecloth or, as I do, with a clean cotton handkerchief.
- As soon as the milk comes to a boil add all the yogurt and begin stirring. You will see the milk split very soon into a whitish-yellow liquid and lots of granular, crumbly cheesy bits. If you once had small children you will have nightmare flashbacks at this point.
- Stir for 3-4 minutes and remove from the heat.
- Place the lined colander in the sink and carefully start pouring in the contents of the saucepan. You don’t want to pour too fast as it will overwhelm the colander; and as more and more of the cheese enters the colander you want to give it time to settle so you can add more on top.
- Once you’ve poured everything into the colander fold the cheesecloth or handkerchief over the top loosely, cover with a small plate and place a weight on top (I use a granite mortar).
- Wait 10-20 minutes for softer or firmer consistency as you prefer.
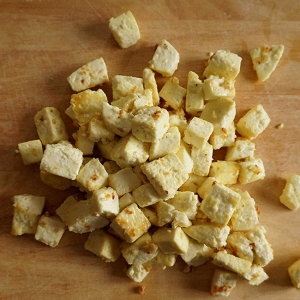
- Unmold carefully and use as you will.
Illustrated Guide


Notes
- This will make close to two pounds of paneer. I usually will cut the block in half and freeze one half right away for future use, and use the rest fresh. Good quality paneer frozen right after it is made is still going to be far superior to what you get in restaurants but freshly made paneer is a special treat.
- Some cube the paneer and lightly fry it before freezing it; I don’t myself but that’s because I never do today what I could do tomorrow.
- Use a much smaller colander than you think you will need—you want the paneer to form a thick block when it’s weighted so you can cube it well for cooking.
- By the way, if you ever come across anyone telling you to substitute something else for paneer, ignore them. If they tell you to use tofu, back away slowly and don’t make any sudden movements. This last may seem unlikely but there’s actually a well-known (and successful) Indian food personality in the US who encourages people to do so in one of his cookbooks, and justifies it with the absurd claim that this is what housewives in New Delhi do as well.
Coming soon: things to do with the paneer you’ve made!

This sounds delicious and easy, thank you for sharing the recipe. However… For the lactose intolerant among us, is there an alternative that could incorporate lactose-free milk? Unfortunately it’s pretty hard to find lactose-free whole milk, so I’m afraid of both the lower fat content and also the different, sweeter and less creamy taste of lactose-free milk, and how it’d affect the paneer taste. Alternatively, maybe cooking/boiling the milk converts the lactose sugar anyway… Regardless, the joys of fresh paneer sound like suffering through any lactose should be worth it haha
LikeLike
Hmmm I have no idea what paneer made from lactose-free milk would be like, taste or texture-wise. Only one way to find out, Fred….It doesn’t have to be whole milk, by the way (though it will doubtless be not as good with lower-fat milk).
LikeLike
I’m not lactose intolerant, but don’t they still sell lactase enzyme you can take in a pill with any food you eat? Doesn’t that work? I don’t know how expensive it is, though, but I thought anyone could enjoy dairy products occasionally with the help of those.
LikeLike
can this paneer be used in a paneer kathi roll directly or does it need to be further cooked.
thanks.
LikeLike
It can be used as is, and can indeed be eaten as is. If that’s the main use, you don’t even need to press it for very long: maybe 7-10 minutes, and then you can crumble it up very easily. or you can press it longer, cut it into longer strips and season and fry them too.
LikeLike